24 March 2014

Living Room Update: Paint

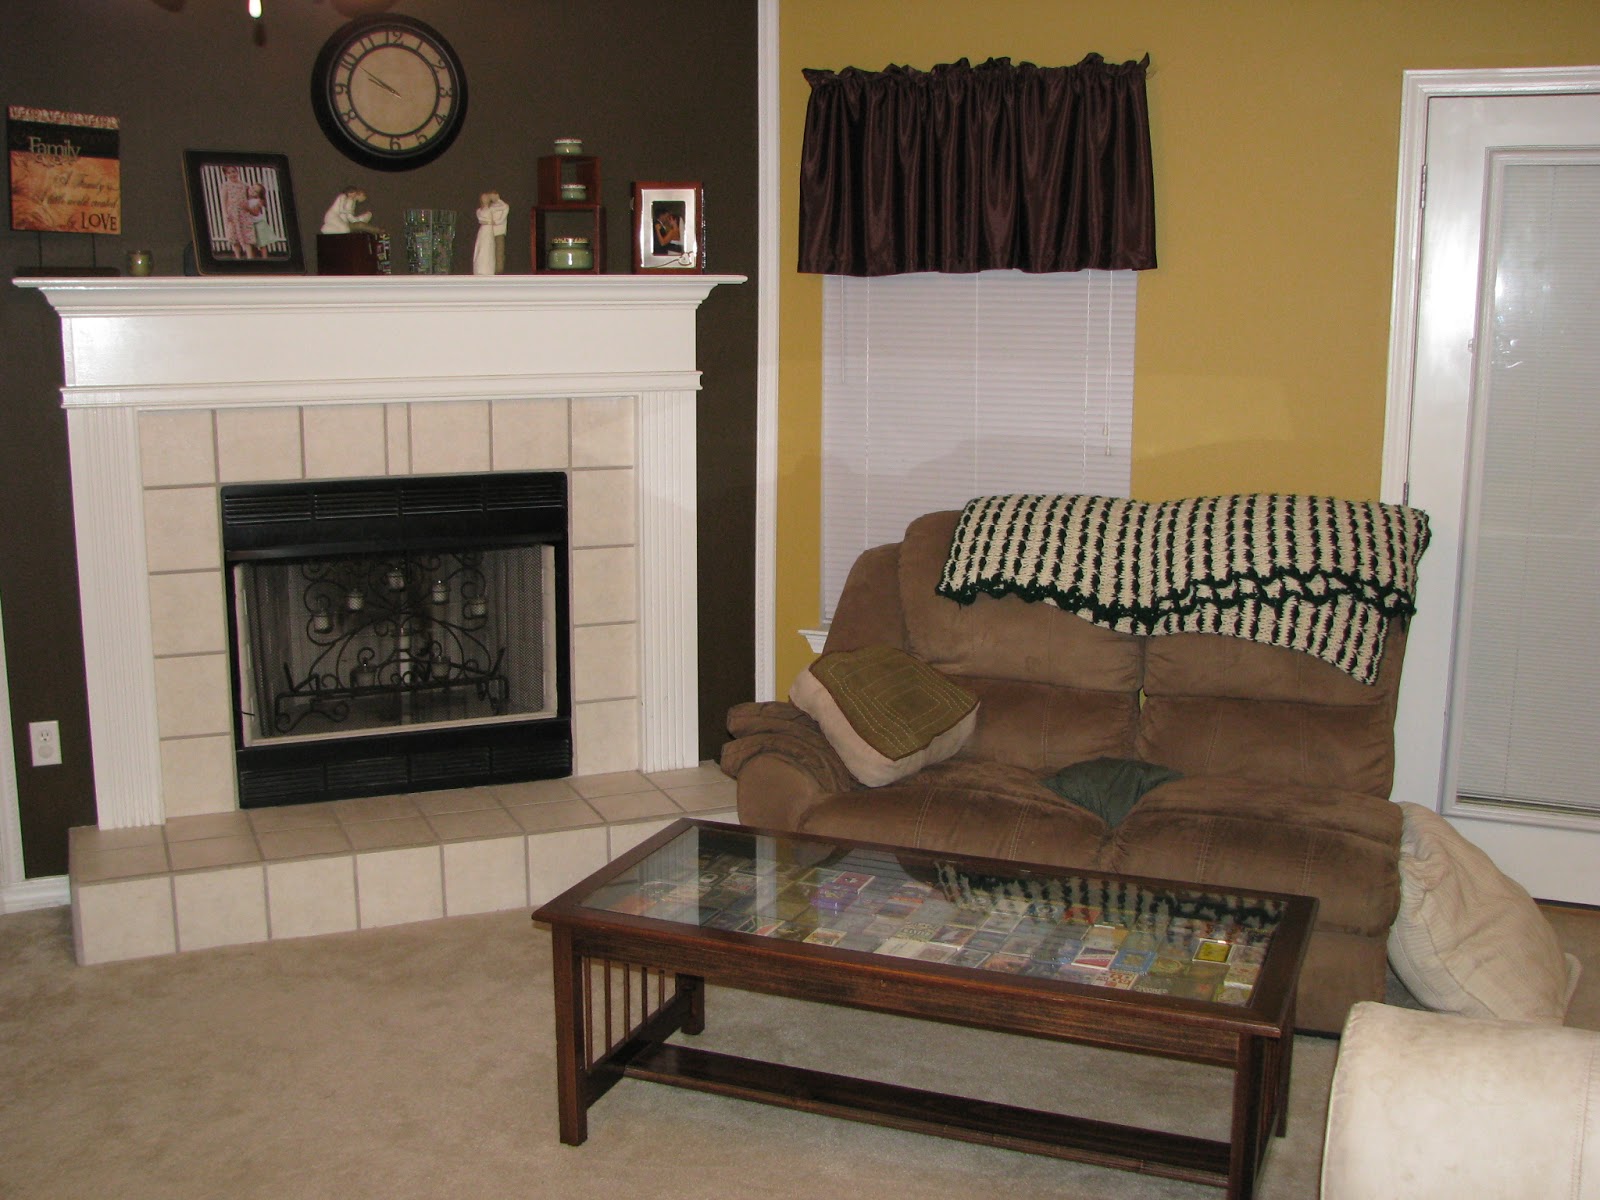
It's been a few months...but I really HAVE been working on our living room update.  Remember where we started?


Dark walls, mismatched furniture, and really the farthest thing from cohesive you can imagine.

I have a wonderful friend who has been helping me with steps along the way to improve...THIS.  Her suggestions were to de-clutter our overflowing bookshelf, repaint, and start perfecting the little homey touches that make the house look a bit more sophisticated.  It hasn't moved as quickly as I've wanted, but I did some cleaning, re-organizing, and sewing.  (The sewing has so far been a flop; I tried to make some natural-colored curtains that ended up being too bulky and colorless for the living room, so it's back to the drawing board there.)  But our biggest change to date has been paint.  She really encouraged me to choose paint that would more unify our rooms (rather than the three colors we had).  She also challenged me to select a darker paint than I was really comfortable with!  But my hubby said it best:  "We decorated your way once before, and we didn't like it.  Let's try it her way."  So...


All parties except me chose the one on the right.  I wasn't even sure about the one on the left!  

We spent our spring break priming and painting with the same good friends who volunteered time to help us refresh the house.  Here's the final product:


And, you know what?  She was RIGHT.  I adore the color, and it made the room completely different. I feel like it's much more unified now.  And I'm eager to start working through the little nuances that will make it look "put together".  I'm going to be on the hunt for perfect curtains, and I need to sew some throw pillows and find a cute blanket.

What do you think?

22 March 2014

peasant shirt


Last week I made a t-shirt dress for myself (like the one I helped Ella with).  This week I made some towel bibs - cut a circle in a dish towel and sew in some ribbing.  And then last night and this morning I followed the instructions on this website to make Cupcake a new shirt.  Although she is only 20 months old, I made her what they call a size 4.  It came together very quickly and I absolutely love it.  The style, the length, the puffy sleeves, the color!  I want to stash the rest of the fabric away to make her another one of these shirts when she grows out of this one.  I could make it longer and turn it into a dress, or add elastic around the bottom or the waist, or lengthen the sleeves - this will definitely be a project to repeat!

14 March 2014

Dr. Seuss!

March holiday!

Even though we're homeschoolers, we still participate in our own way in Read Across America, which is a public school thing where they read Dr. Seuss books and do Dr. Seuss activities for a day. It's to encourage kids to read. We take an entire week of reading loads of books ... which, to be totally honest, is nothing new or different for us. But it's an excuse to set aside "boring" things like math and writing, and just read the whole week for school. This year, we added going to 3 different libraries in surrounding communities rather than our own. Aaaaaand ... we have Dr. Seuss clothes now!

This started as an accident. I was trying to order flannel for a baby blanket, and when the green character print arrived, it was not flannel. Just regular cotton. So I figured I'd make some fun skirts with it, and ordered the stripes and the spots. The stripes are actually from the Dr. Seuss line as well - I don't know if you can tell from the top picture, but the stripes are not clean, straight lines. They're a little bit squiggly. The red criss-cross on the top 2 skirts was something I had bought for another project that also worked with this. I got the Seuss fabric from fabric.com - it's the Celebrate Seuss collection from Robert Kaufman.

The 4 older girls all have tiered skirts - I used the directions in this old post from Craftiness Is Not Optional. SM and JE (#1 and #3) have their middle level wider than the top and bottom, and pockets. RG (#2) has no top yoke, just a ruffle around the bottom. She also wanted pockets. SM's pockets were from the dress pattern I made for the baby, but the other 2 just had squares cut and added. TA (#4) has the closest to the original tutorial with her tiers all even, or at least as even as I could get them. The seam allowances still throw me off a little bit, but I am going to declare the tiered skirt mastered and move on to something else. There are a billion and one skirt ideas out there. I need to not get so stuck on doing the same thing over and over ... even though if you want to use multiple fabrics, tiers are useful for that.

And the baby, down at the bottom, got the Oliver + S ice cream dress. It's my second pattern to use from them. The top cuff on the pockets threw me off a little bit while reading the directions, but once I got over the bump, they came together perfectly and the dress looks great. (The dress also fits TA perfectly as a tunic shirt, so I don't have to trace off another size to make her a top. Yay!)


Happy reading! Our favorite Dr. Seuss books are Mr. Brown Can Moo, Can You? and The Cat in the Hat. Our favorite Dr. Seuss movie is The Lorax.

06 March 2014

St. Patrick's Day Dress


There are so many things I love about this dress, and a few things that I don't.  I made this dress all by myself - no cheater t-shirts.  I started with a simple bodice pattern, and then tweaked it until I liked it.  I finally got flutter sleeves figured out.  I love the fabric, and the button loops and the green trim. 
 
Next time I need to make the bodice just a little bit bigger around the middle - it fits better than the shirt did, but it's still a bit of a pain to get on and off.  And most importantly, I need to cut the skirt at an angle, so it is fuller at the bottom - Cupcake struggles to run and play because it is a little constricting. 
 
I'm sad that it isn't perfect, but I'm still pretty proud of myself.  And I'm aware of the things I need to change for future projects.  Not sure what is next on my list of things to do.  I've been meaning to make myself a tote bag (need a nice big one for the library).  Easter is coming up, so I could work on that project (I have the fabric, not sure what it'll be).  I'm not happy with how all of Cupcake's shirts are becoming too short, so I want to try my hand at peasant tops.  Or I'll take a break until KCW next month and focus on some artwork.


afternoon dress

My friend's daughter, Ella, is being homeschooled this year.  She's been feeling rather lonely, and stuck at home, so I invited her over to my house every Wednesday for hanging out - sewing, drawing, talking about books, doing math, whatever we want.  This is just time for her to get out of the house.  She wanted to make a dress, and brought me some awesome Superman comic fabric to work with.  We were going to attempt a circle skirt, but came to the realization that we didn't have enough fabric.  So instead I came up with a non-pattern (just measured, drew some lines and cut), and it turned out exactly like we wanted.  We used a t-shirt for the top and added a sash in the middle, and we couldn't be happier.  It was finished within a matter of hours.  I drew the pattern, and sewed on the sash, but Ella did everything else.  It is incredibly flattering on her, and it hits the right length just below her knees.  She's going to make a crinoline with our friend Sherry to go underneath it to make it poofy.  I'll have to take better pictures when it is all done.

25 February 2014

oops

Lest anyone think that we have only achievements and success around here ...

1. I had bread rising in the oven yesterday - I turn on just the light of the oven and it warms up the box enough to let the bread rise fairly quickly, rather than have it sitting on the counter in a fairly cold kitchen. I forgot about it when I turned on the oven to preheat for baking a dinner casserole. At 400. I remembered the bread when I opened the oven to put the casserole in. It was crusty on the top and mucked up dough in the middle so there went my 3 loaves of bread for the week. I have to start over today because we're out of bread, and my children eat very little beyond peanut butter and jelly sandwiches.

2. Dinner also didn't turn out. I tried a new recipe - a chicken pot pie type of thing, except it was pork and zucchini with Tex-Mex spicing, and cornbread on the top. It tasted okay but didn't look particularly appetizing. I'll finish eating the leftovers but this is definitely not something I will repeat or share the recipe.

3. Adam was baking a lemon torte cake to take to work - I took it out of the oven too early and it was doughy in the middle. Sorry, honey.

4. I'm still working on more flannel nightgowns. On TA's, I was putting the facing on the neckline but it didn't line up at all. I had to take the whole thing apart and do it again. This is still in midstream - I've picked out all the necessary seams, but haven't put it back together again.

23 February 2014

maxi skirt

Just a simple maxi skirt I made this week.  I've been wanting one for a while, and had the perfect amount of this fabric.  It would be better if it were made of a knit (this stuff has zero stretch), but I really liked the colors and the silky feel of this fabric.  Small slit up the back for ease of movement, and an elastic waist.  There will be more of these in my future.

18 February 2014

Nothing Says Love Like Practicality

I wanted to join the challenge of sewing for seasons and holidays.  I really did.  I made a Pinterest board and had all these cute ideas for Valentine's decor and gifts, and we were going to set a sweet table with a well-planned, fancy dinner.  And then life happened.  Late nights, papers to grade, long hours for my hubby, school concerts...etc., etc.  So I decided that, rather than kill myself trying to make something that was PURELY seasonal, I'd go along with (what I interpreted to be) the "spirit" of the challenge and do something FOR a holiday.  And that led me to focus on sewing my Valentine's gifts, rather than the decorations (which were essentially nonexistent, by the way...a candle on the table and red placemats).

Our family follows the Dave Ramsey financial plan, and we are working our oldest kids into it; the little one doesn't care yet, but loves money!  Anyway, the girls have been using -- for a year -- envelopes that we write "Give", "Save", and "Spend" on to keep up with their money.  The envelopes rip, get wet, and get lost, and we have replaced them often; they also weren't great for holding coins.  Last week, though, I found a seller on Etsy who made three-pocket zip wallets for just this purpose.  They were a little pricey, but I was able to dash off two of my own in about an hour.


They are really easy to make.  You need:
-2 pieces each of exterior and lining fabric (mine were 9" x 4.5")
-1 zipper (mine was 7")
-ribbon or twill tape for the labels (I used ribbon and wrote with a Sharpie; it bled a little on the satin but was great on the grosgrain.  Next time, I might try using printable iron-on transfers because I think they would look neater.)
-matching thread

First, measure where you want your tags; I folded the fabric in half longways, pinned on there, and then divided the remaining distance equally for the other two.  Baste the tags into place.  Then lay one lining fabric face-up, place the zipper face-down on it, and lay one exterior fabric face-down, then sew them together along the zipper.  Iron both pieces of fabric out away from the zipper.  Then do the same thing on the OTHER side of the zipper.  When you iron the pieces out again, the two lining fabrics will be on one side (facing up); if you flip the whole thing over, the two exterior fabrics will be on one side facing up.  Next, unzip the zipper about halfway (to help with turning later).  Pin the two matching fabrics together, right sides in.  Sew from the middle of the bottom of the lining, around one side, across the bottom of the exterior, down the other side, and back to about 2 inches from your start.  Reach inside, unzip the zipper all the way, and turn the fabric.  Then close your seam, put the lining back inside, and iron the whole thing.  Finally, zip the zipper and mark where you want your dividers to be.  (Each of mine was a hair over 2 inches wide.)  Sew from the bottom up almost to the zipper, but don't sew the zipper shut!

Overall, I was really happy with how these turned out, especially since I was just using scrap fabric.  If I was going to do it again, I would say to make the whole thing a bit longer; the pockets are a tad narrow, but little fingers can handle it.  Also, if it gets too long, you need to worry about maybe folding or rolling the whole thing (and having a closure for it) so that it doesn't get too unwieldy.

My husband laughed (in the most good-natured way) when I told him what I was making the kids for their Valentine's Day gifts; I assured him that they would love these.  And they DID...there was so much excitement over giving and saving money!  Which, really, is what this whole thing is about.
16 February 2014

L-O-V-E

Holiday project 1! On a whim the day before Valentine's Day, I made these little pillows. The white fabric for the letters is all fuzzy (and was a pain in the neck because it shed all over when I cut it). I went a little crazy with the ribbons and all on the backs. I'm gearing up for the Independence Day skirts I have planned - they'll be in the same red fabric as the pillows (I got a ton of it from my mom when she was clearing out her stash), with a crazy amount of white and blue ribbons and trims for decoration.


11 February 2014

sleeveless blouse


In preparation for Cupcake's St. Patrick's dress, I decided to tackle the bodice.  I found a free pattern online and tried it out.  It was huge.  I cut down on the length, squared the neckline and tried again.  A better fit, but still too wide across the top.  I trimmed down the pattern a final time and added the opening in the back.  As I put it together I was worried that it would be too small (and it is a little snug), so I'll adjust it once again just a touch for the dress.
 
After all of that, I still haven't gotten sleeves figured out.  I followed three different tutorials, but different sleeves require different timing, so it didn't work out.  I made a quick strip of (un)bias tape to finish things off and make it a wearable top.  After making all the skirts the bottom was done in no time flat.  I'm proud of this top, and learned lots, and look forward to learning more. 
 
Before I tackle the dress I'm going to do a round of instant-gratification, mindless baby blankets.  A friend's mother was getting rid of a whole bunch of fabric and trims, so my stash just doubled.  A majority of that fabric is for baby blankets anyway (flannel and baby-print cottons, along with satin bindings), so might as well start using it up.  We've got seven babies on the way at church, so it's good to be prepared!