31 March 2012

sewing goal so far

Yeah, so that sewing goal of posting 12 projects this year, at one per month? And it's March 31 and I still haven't posted anything ... BUT! I have been sewing!

I started with finishing the fish for the baby's cloth fishbowl in the Christmas present post.

Then I did a test run for the pattern I wanted to use for the girls' Easter dresses. Adam got me the book One Yard Wonders for Christmas, and it's in there - it's a variation of a pillowcase dress. I used some vintage-y fabric that someone gave me when they were cleaning out their sewing room to move. Good thing I did the test run because since I finished it, SM won't wear it and is insisting that she asked for a skirt rather than a dress. That's a load of garbage, but either way, she won't wear the dress. And that's too bad because I really like it. 

While I was at it, RG got a new skirt. When I make something for one, it's only fair that I make something for the other. She chose which fabric she wanted, and I put it together in just a couple of afternoons. The thing that took the longest was doing the elastic around the waist because at first I sewed it all shut without trying it on her and it was way too loose. So I had to undo it and tighten it up. I love the pink rick-rack around the bottom - my first detail I've added on anything I've ever sewn. Which, of course, is not much yet, but still. Details! I'm not good at details like this, so I was really happy that it actually worked and looks cute.

 practicing something from her ballet class at a gas station stop on our recent trip to Texas - there was music playing outside the store

happy girl in her skirt that Mom made

I've started the Easter outfits. JE's is done - it's a dress from the same pattern as the first one. TA's is cut out and started - it's a sundress with buttons over the shoulders. I'm using an actual paper pattern for the first time, borrowed from my next door neighbor. I think I can get the facing done tonight when Adam gets home from his church meeting. SM and RG will have skirts, probably with white shirts. I'm using this tutorial for simple skirts from Made - SM will get the double skirt with the bias tape binding around the hem (the green one with yellow trim in the tutorial). RG will get just the regular skirt, and I got some lace trim to have peek out from the bottom as a little flourish for her. 

AND I even got fabric to make myself a new skirt for Easter! The kids get new clothes. Why not me too? It will also follow the simple skirt idea - I don't have the time or expertise yet to do anything more fancy. But I'm really excited about the fabric - I got it from Modern Fabric Studio from their clearance section. LOVE their selection and the service was good - I had some followup emails about the purchase that I appreciated, and when the fabric arrived, SM declared it "the most beautiful fabric in the world!" I got 3 different fabrics from them, but only have plans for one piece so far. I will definitely keep them in my bookmarks to buy from them again.

So here are my January/February projects, and a preview for March/April. I'll definitely take pictures of all the Easter dresses and get those posted soon. And I already have a bunch more projects lined up as soon as the Easter dresses are done. I took the girls to Walmart a couple of weeks ago and they all chose fabric to get 2 t-shirt dresses. Each. Eight more dresses - there's April/May.

Grand total on clothes I've made so far: 4 Christmas dresses, 2 playdresses, 1 test run for the Easter dresses, 1 skirt for fun, 1 Easter dress.
On the schedule: 1 more Easter dress, 3 Easter skirts, 8 more playdresses. 

14 January 2012

finally - the Christmas presents I made

For this Christmas, I decided to make at least one thing each for Adam and the girls, and homemade for all the extended family we were getting gifts for. Here are my results (and this is going to be a long post):

patchwork quilt doll blankets for my 3 big girls, plus two more for cousins. I used this idea as my inspiration for making them. When I was going through a friend's scrap box for another project, I also thought of doing the patchwork - they were 4-inch squares, 4 across and down so about 16 inches square total. You'd want to adjust based on the size of doll you're making it for - we have fairly small dolls.

Adam wanted a fleece liner for his sleeping bag, which is a summer-weight bag but he has some winter camping to do this year with the Boy Scouts (if you can call it "winter" around here). I actually just gave him the fleece in his gift box because I ran out of time, and I sewed it later in the week. But it was done before New Years! I had teased him about getting him something pink and princessy so he would think of his girls back home while he was out camping, and he actually asked (because I was "really" going to get him pink fleece for his sleeping bag) that whatever I got, it not be embarrassing. I tried to find Lightning McQueen or something equally as kid-fun but definitely BOY, but all I could find was Thomas the Train. Eh. I went with soccer balls (on a BLUE background) because my boy LOVES soccer.

Baby got a cloth fishbowl and fish ... which will be played with by her sisters. Inspiration, pattern, and directions here. I did hit a point partway through making the first section of the bowl when I got really aggravated with it. It was a bit more challenging and time consuming than I had anticipated. But then it came together and I thought, "OH! That's how it works!" And I was really excited about it. I'm not saying I'm going to rush out to make a bunch more of them but in the end, I'm glad I did it. It's really cute, and maybe if we have boys later, I'll make one for them out of boy prints instead of all the flowers. No fish in the picture because I have to redo them.

I stole the idea for ribbon boards for the girls' hairbows from a friend. I've seen these boards for photos and other bulletin board uses, but here we go with the hairbows! I had two 11x14 frames that the glass had broken from so they weren't being used. I painted them to be the same color, and made the boards out of cardboard (cut to size from a diaper box), quilt batting, fabric, ribbon, and my trusty hot glue gun. The ribbons are glued on the back, but not tacked down at the cross points like they would be on a photo board. That's where you clip on the hairbows. I made some of these, some were bought, some were given to us.

I got my sister Emily's name in our sibling gift exchange and the theme was "something useful." I had some fleece left over from a baby blanket with penguins on it - she LOVES penguins. It was so her. And the pink was to remind her of us and our PINK girls! I made a hat and scarf for her. I also made a scarf out of the blue fleece that I specially ordered for my sister Tawnia as a sort of thank-you for all the help she gave us this past summer on our family reunion vacation. I was almost 7 months pregnant with TA at the time and was not keeping up with my other 3 kiddos. Tawnia was AMAZINGLY helpful. Anyway, before I wrapped and boxed up the scarves and hat, SM and RG modeled them.

close up of the hat - I added a little fringe on the top. I used a fleece hat that Adam has for my pattern mockup. It was 4 quarter pieces, and then a band all the way around the bottom.

I didn't get pictures of the next three things ... My brother and his family spent Christmas with us, so I made gifts for them. I made a fleece pillow for my nephew. I got the idea from a display at Hobby Lobby - get a pillow form from Walmart or something, cut a big square of fleece for each side, and do knotted edges all the way around. I had boy-print fleece already for my baby blankets that hadn't been cut into yet - blue background with lizards on it.

My 12-year-old niece got a couple of little makeup bags - this is the tutorial that I used. I altered the measurements slightly to make it a little more narrow from top to bottom, and wider from side to side. I had to buy a whole yard of oilcloth because that was the smallest measurement and only used a few inches of it so now I need to figure out what else to make with it. More makeup bags? It's a dark purple background with funky Hawaiian looking flowers on it - orange and yellow.

For Grandma and Grandpa, who also spent the holidays with us, I bought 4 plain white dish towels and had my 4 girls draw on them with fabric markers. Well, the baby didn't do the drawing - I did big block letters of her name and each letter was a different color. That idea came from the Family Fun magazine.

Adam even got in on the homemade trend. He made me a pegboard for the many spools of thread I'm accumulating with my new hobby of sewing. The pegs are at an angle so I can hang this on the wall and still see all the colors on the spools. (I can't figure out how to rotate the pictures in my new photo program - it's very annoying.)

Adam cut (with machine tools owned by a friend from church), sanded down, and painted this wood set for my brother and his wife. The model was a wood piece just saying LOVE that we received as a gift last year from a friend.

And now you have lots of ideas for Christmas this year, or birthdays between now and then, or just stuff for fun!

10 January 2012

2012 goal for the blog

My personal target for this blog for the year is to post one sewing/crafting project and one new recipe every month ... or 12 for the year of each since I'm sure there will be a month here and there when I don't get any sewing done, let alone finish something.

With the sewing, my list for the year is:
~ Easter skirts or dresses for all 4 of my girls
~ alter the skirt that I wore on my wedding day when I wasn't in my white dress
~ a beach blanket from old jeans
~ skirts for SM and RG out of a dolphin panel print that my mom gave me
~ fix and tie a quilt that Adam's mom made for him - the back of it tore open and the batting is all wonky. I want to pull out all the batting and put in new, and tie it. It was never tied.
~ a baby blanket for my sister's baby due in August
~ the summer playdress wardrobe for my kiddos who are growing out of everything faster than I can keep up
~ some kind of Independence Day decor for our house. I have a couple of ideas but I'm still looking.

I'm also starting to find toys online that I think would be really cool to make for the babies - I'll put those in another post when I get the links compiled. I loved making a lot of our Christmas presents and am getting to be very anti junk-plastic-toys from the store. Well, really, I'm getting to be anti STUFF in general - the sheer accumulation is driving me bonkers in our little house where we have all this STUFF but nowhere to put it away out of sight when it's not being used. But that's a tangent and a rant for another day.

I'd like to still post recipes - whether or not I actually cook it - because Adam is quite skilled at reading a recipe and knowing if it will be good or not. He does not like to eat the same things all the time and is constantly on the lookout for more recipes. He consistently finds excellent food combinations that (he says) are not difficult to make.

02 January 2012

My Christmas Crafts

Last year, I had the rule that everyone who received a gift from me would get at least one homemade thing. I didn't do quite that well this year, but I did make several gifts that I was really proud of and which were big hits! I'll do pictures and instructions for three crafty gifts in this post. (In advance, I apologize that I don't do photos or descriptions as well as professional bloggers do, but I'd be glad to explain more if I need to. I also got all these ideas from the internet, so it's easy to find more information.)

1. Knit scarves

I do know a basic knitting stitch, but I literally can just do straight lines. I cheated this year and let someone else do the knitting for me, and I just did decoration. I bought a set of jersey knit sheets at Target. (A queen-sized set was $24.99; I probably could get a much cheaper set on clearance somewhere, but I really liked the bright red one I found. Anyway, since it was lots and lots of fabric, I figured it was worth it.) Then I picked out the seams; I only ended up using the fitted sheet, so I left the other parts alone. (I will be making pillowcase dresses out of the two pillowcases, and I am currently using the sack the whole thing came in as a portable DVD player case. The flat sheet will get used for another project in the future.) Next, the hardest part: cut the entire length of the sheet into 16-inch sections. I found that the entire length was a bit too long for a scarf, so I ended up cutting off about ten inches. Basically, just hold it up and wrap it as you'd wear a scarf to test the length. No need to hem anything; it will coil up naturally and just look cute. If you want, you can stop right here and have a solid-colored scarf, but I decided to do some decoration with a bleach pen. DON'T use the color safe one; use the one for whites (about $4 at Target). Stretch the part of the scarf you want to decorate -- I suggest the ends -- over some plastic or cardboard; cereal boxes work well. Secure it with alligator clips. Then "write" or "draw" with the bleach pen. It's a sort of gel, and it WILL splatter, so wear old clothes! Allow the design to sit until you see it start to change color; mine took about 20 minutes. Then rinse off the excess bleach and wash the scarf in cold water. I had enough fabric in the fitted sheet to make five scarves, so even without utilizing the other parts of the set, the scarves were about $5 each. I found lots of instructions and tips for painting with bleach and bleach pens by Google-ing "bleach pen art". You can do this on t-shirts and tablecloths too!

2. Kitchenaid Mixer Cover

I'm especially proud of this one, because I didn't have a pattern! I borrowed a store-bought Kitchenaid cover from a friend and laid it on fabric to trace. You'll need to use heavier fabric than just cotton; I used a home decor weight. It takes two pieces that are essentially semi-circles. (For a 4-quart mixer they were about 13 inches wide and tall, but with the top two edges rounded. You'd make it bigger for the 6- or 8-quart mixer, and make sure to leave 1/2 inch on all sides for a seam allowance.) Then cut a piece to put them together. For my mixer, it was 4 inches by 38 inches. Pin the center piece and one semi-circle piece with right sides together, then sew; do the same with the others. Then make a narrow hem all around (I did 1/4 inch double-folded), and you're done! I searched "Kitchenaid mixer cover" online and found basically these instructions; I modified them a bit because I didn't feel like doing any quilting or using seam binding.


3. Bow Holder

I got the idea for this one from the blog Make It and Love It (www.makeit-loveit.com). It started with a really ugly $4 picture frame from the Salvation Army. I threw away the picture in the middle and the glass, but the glass could be useful for something else if you're industrious. I cut a piece of fabric that was big enough to cover the frame. I laid the empty frame over the fabric, then cut about one inch larger than the frame all around. Then I cut out the center of the fabric, leaving about one inch around the inside of the frame as well. I use Mod Podge to paint the frame and stick the fabric to it. To do this, you need to cut the inner and outer corners in a slit to fold them over nicely. Once the fabric is all glued down, Mod Podge the outside to make it stiff and shiny. After that, find a contrasting fabric and lay the cardboard interior over it; you just need to cut enough to cover the inset, then hot glue it down. Finally, cut enough ribbon to put at intervals along the inset -- I used five. You'll hot glue only the top and bottom of the ribbon, leaving the lengths of the ribbon loose to put bows on.


I had a really good time doing these, and so far the recipients have been pleased!

17 December 2011

Christmas projects in action

Well, I didn't get 12 Christmas projects done this year but I am happy with what I did finish. Here they are in action!

 project ONE!

the garland over the patio door

 Making a wreath wasn't on my original list of things to do, but I saw it online here and really liked it. It's kind of small on my door when looking at the whole thing but I still like it. Adam actually wound all the yarn, and I made the roses out of felt like this.

Baby girl TA in her jumper that matches the playdresses that her sisters have. RG and JE modeling their dresses here.

This is the only picture I have of SM in her dress, with Mary Lane Haskill, an up and coming Broadway singer who performed in a show locally that I sang in a backup choir for.

The Christmas cards made with my tree skirt scraps are all tucked into envelopes and I was just waiting on my photo order from Walmart (which was LATE. Dumb store.) They can finally go in the mail on Monday.

I've been going a little crazy with the present-making, and yeah, I'm getting a little impatient to post pictures of them so I can show off and say, "LOOK WHAT I DID!!!!"

06 December 2011

Christmas Picture and Crafts

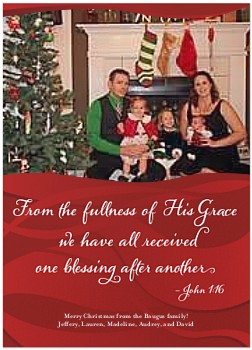
I'm terrible at taking photos AS I do a project, but this one is the culmination of several. I had a friend embroider the second stocking from the left (Maddie's) ast year, and I think I'm going to do green, gold, and red and get one embroidered for each of us now that I think the family is "complete". My goal is to get a quasi-unified look on all the stockings. Also, there are two homemade ornaments from this year on the tree (which, unfortunately, you can't see really well). Directions for them are below. You're also looking at the entire extent of the Christmas decor in the house...we didn't want to go overboard with small kids!

Ornament project #1:

You'll need a lid from a baby food jar, an ink pad, some colored construction paper, glue, and ribbon. Get a thumbprint of your child (baby's first Christmas is fun, but any age will work) on the paper. Around the thumbprint, write the child's name and the year. Cut a circle from the paper the same size as the inside of the baby food jar around the thumbprint and writing, then glue it inside the lid. Wrap ribbon around the edge of the jar, secure with a little glue, and hang on the tree. I have one of these from when I was a baby, and I thought it was really fun to make them with my kids too.

 Ornament project #2:

 You'll need pasta with holes (penne, macaroni, wagon wheels, etc.), food coloring, yarn, tape, and an oven. Put DRY pasta into a bowl with a few drops of food coloring; for about 1/5 of a box, I used about 8-10 drops. Stir until the pasta is coated. Repeat for all the colors you want to do. Then put the pasta on a baking sheet in the oven at 350 until the food coloring is set, about 10 minutes. After it cools, wrap tape around one end of a piece of yarn and let your kids string the pasta onto it for garland and/or necklaces (we ended up with both!). Unfortunately, like a popcorn string, trying to make a big enough garland to wrap all the way around the tree wasn't a reality with short attention spans. We made four small garlands and just put them in the FRONT of the tree! As far as the Shutterfly link, this is my favorite photo ordering site, because they ALWAYS have coupons (part of being a domestic goddess is saving $$$!) and ALWAYS give cash back into your Upromise account. I definitely recommend checking it out if you haven't done Christmas cards yet.


04 December 2011

Spinach Artichoke dip that will change your life!

OK - so I am willing to admit that ... maybe... just maybe the "change your life" part of this post may be influenced by this pregnancy. I am not ashamed to admit that I have been making this weekly for almost two months now. But my hormonal food issues aside this is REALLY GOOD, and super easy! I actually haven't ever baked it - I usually just make it cold and then heat up a small portion at at time - or for large gatherings I have put it in a crock pot to stay warm for the entire party. And yes, I am eating some right now as I type this :)

01 December 2011

as backwards as it gets

Adam asked me to make him a sleeping bag liner for one of his presents, so I ordered some fabric for it. I haven't told him what I got - just that he won't be embarrassed to have it when he camps with the Scouts. Yesterday, my fabric shipment arrived (with fabric for a couple of other projects as well). Well. The fabric I need for Adam's project was not in the box. The sticker that said "(print) blue fleece" was on a piece of fabric that was NOT fleece. And it was NOT blue. It was regular cotton in a nice shade of purpley-pink. 2 yards of it.

Adam is so anti-pink right now that ... well, I still don't even know how to describe this except to just say what it was. I was on the phone to fabric.com within 5 minutes of opening the box to get the BLUE FLEECE sent. Fortunately, Adam's project can move to last in line because it can be done the quickest.

(And I get to keep the 2 yards of pink cotton - it will be cute for spring skirts or dresses for the girls. But we'll talk about that later. I have all the Christmas presents to finish before I start on something new.) 

25 November 2011

it's working!

A Washington Post article you might be interested in:

The new domesticity: fun, empowering, or a step back for American women?

I found it interesting since I did exactly what this article talks about - gave up a career in government and politics to stay home with my kids. Now I'm homeschooling, I'm learning to sew and knit, Adam and I started canning this past summer, we grew our first container garden this past spring and it's still producing tomatoes and various herbs, we bake all of our own bread, we have the stuff to make our own laundry detergent (just need to actually do it - haven't had time) ... wow. I hadn't put all that in a list in this context before. Operation Domestic Goddess - while not finished by any means - is well underway and so far pretty successful. Yay!

Actually, I'm kind of stunned.

11 November 2011

still nesting?

The baby is a month old today so I'm not sure if this is some sort of postpartum nesting thing (does that even happen?) or the weather changing or what. But I want to clean clean clean. I want to sew. And I really want to bake something warm and sweet and yummy. Adam is on his way to the grocery store in a few minutes and I'm cleaning the fridge while he's gone. Then we'll see what happens with the rest of the weekend.