Showing posts with label Sew All 26 challenge. Show all posts

20 October 2018

Z is for zig-zag

Four years and six days later ... I have FINALLY finished the Sew All 26 Challenge!! With lots and lots and lots and lots of zig-zag stitches. I ended up with this: a purse made of rope.


I got the idea for a rope tote bag from this post by SouleMama - second picture down. LOVE that. I didn't have enough rope to get quite that large, but still ended up here and I'm excited to use this! The bottom is 11 inches long, and the widest point of the curves is 14 inches. The height is 10 inches.

The curves are totally accidental but I like them a lot!


The handles were glued on with a whole lot of hot glue. My sewing machine will barely fit one layer of rope under the foot. No way I was even going to try with two layers.

The general idea when sewing with rope is to set a zig-zag stitch, and put two sections of rope right up against each other. You just keep turning and turning the piece until you get what you want - lots of people do bowls because they don't take much rope. I made some small rope bowls in 2015 - they hold random little things, and one is currently on JE's dresser to hold a bunch of hairbands.

For the Sew All 26 Challenge, I'm excited this is my grand finale!

09 July 2018

June journal

1. the snail tote bag.


2. Y is for yellow shirt.


3. More zip bags! Two for another sister-in-law, Laurel (London got the travel set before), because every time she comes to visit from Virginia or we go there, she ends up cutting my hair. When she was here visiting in April and cut my hair again, I wanted to do something for her in return. She chose the fabric but I just finally got them done ... and then forgot to mail them to her before we left on vacation. So they're still sitting on my table. Oops.

4. Our church's youth group is doing "Trek" this year, where they dress up like 1850s pioneers and drag 500-pound handcarts around in the woods for a couple of days. (I am not sad that my own children are not yet old enough for this event.) The girls at church made their own skirts and AJD didn't like how her's turned out. She'd cut it in a huge rectangle, probably 2 yards long, and then just put elastic in the waist to bunch it WAY up. I was bribed with a multi-year-loan of a serger (!!!!) (while AJD serves a mission and goes to college) to fix it in one day, 2 days before we left on vacation. I chopped the top elastic strip off, cut the rectangle into more of an A-line structure, and used my Anywhere Skirt instructions to make a fitted waistband with a button placket. Muuuuch better!

So except for JE's field day shirt, all of the sewing this month was for other people. And all of it was done really fast, almost on the fly. June was a crazy month with the end of the school year and leaving on a 17-day vacation an hour after school ended from which we got home yesterday ...

July sewing is costumes for summer theater and the performances are in only 3 weeks. So I gotta get moving on that. Maybe in August I'll finally have time to do my epic letter Z, and sew some new clothes for the new school year for my girly girls ... and THEN, in the fall, I will get back to the quilts. Whew!!

08 June 2018

Y is for yellow

I was not going to do a Y post with yellow - Mindy already did that. But for the second Thursday night in a row, I found myself with a sewing project that needed to be done RIGHT NOW.

Found out yesterday morning that Field Day was today at school, and the 2nd graders needed to wear yellow shirts. After some looking around, I figured out that the only yellow shirts for children that we own are all pajamas. But ... there's some yellow knit fabric ... and I did just get the Girl on the Go dress/shirt pattern from Oliver+S ... so at 10 pm last night, I made one.

Size 8, with the length at a size 10 because I like shirts to go a little further onto the hip. It took about 2 hours, because the knit was thin and kept rolling up on me, and I went reeeeeeally slow because I didn't want to warp it while it went through the machine.

Here's our fearless warrior girl ready to go to Field Day this morning!


I did a decorative stitch for binding the facing down, just for fun.

31 May 2018

May journal

SEWING
Quilts, crafts, and clothes. Covered it all this month.

1. X is for X block in the Squared Away Block of the Month. The X was March's block, and I also did April's block. Green done, yellow done. Still working on pink for May.

2. Four more blocks for the Night Sky quilt. I'm trying to get section 2 done of the quilt, but it's not quite coming together yet. I wanted to do more on this project, but at least I hit the minimum.


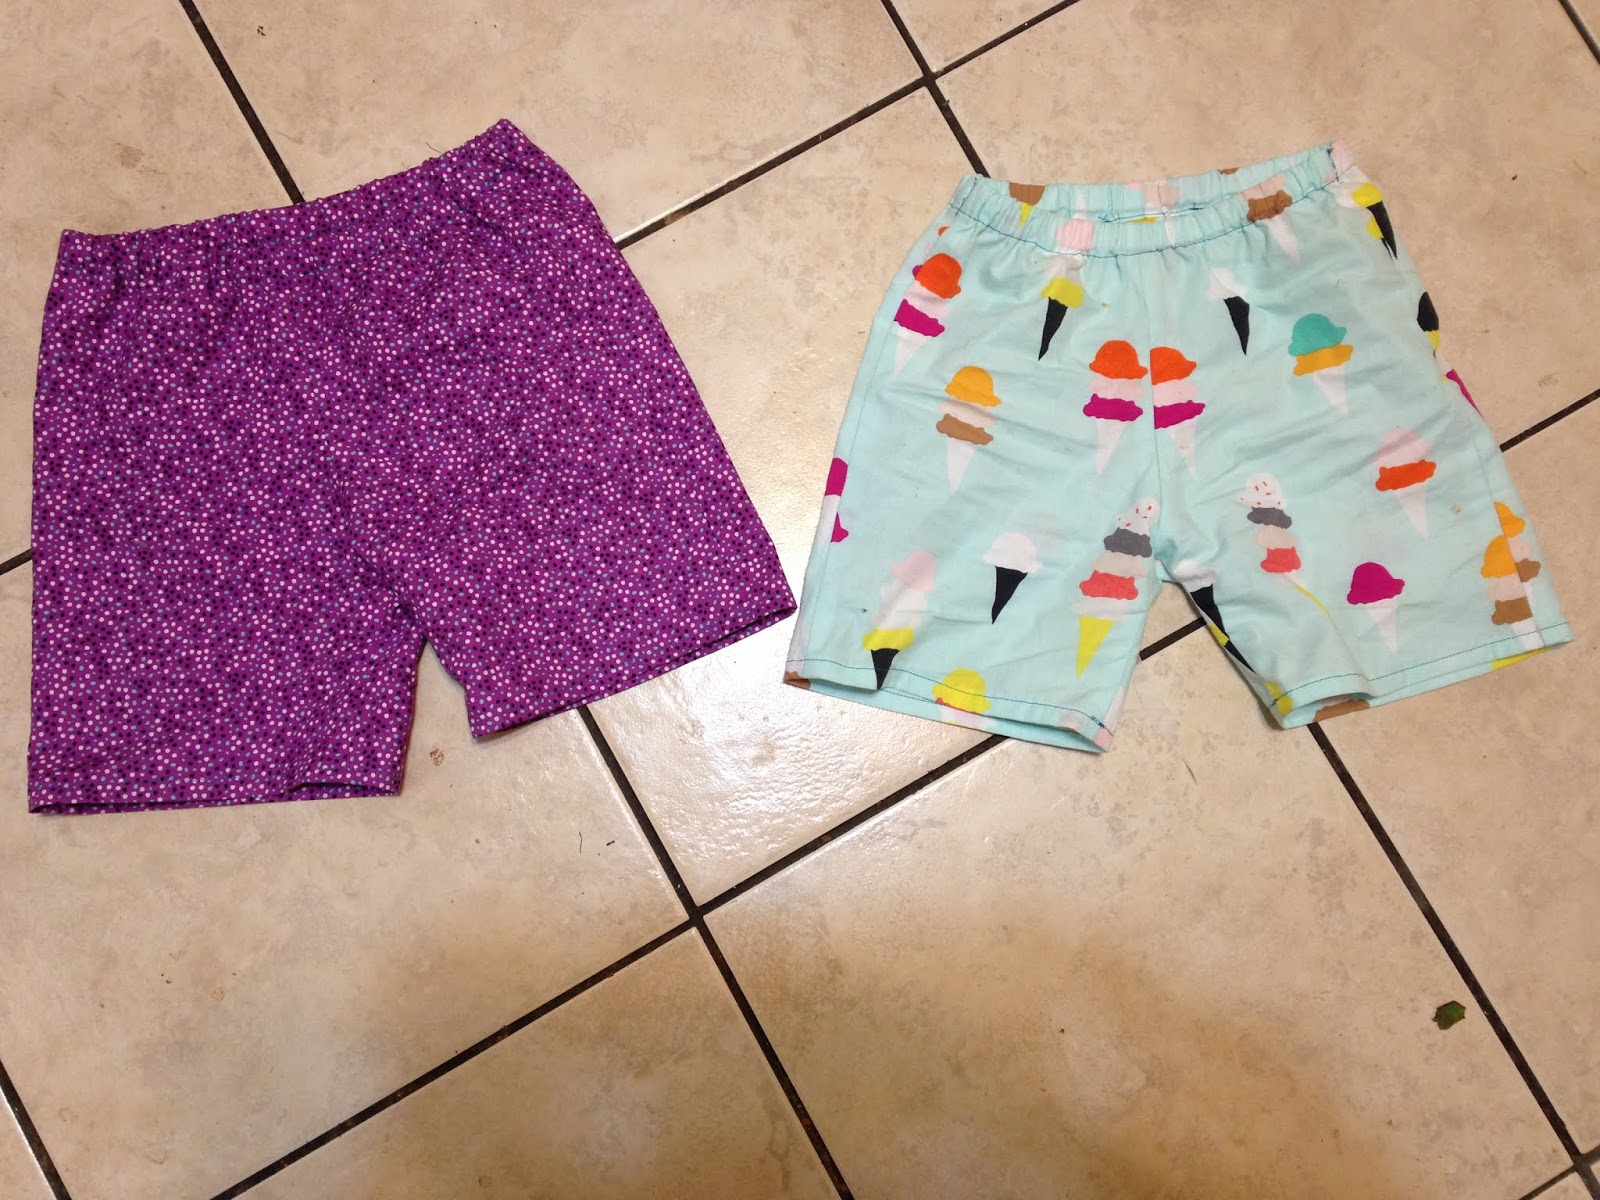
3. Two pairs of shorts, one of TA and the other for JK. More coming.


The purple speckles was from the remnant bin at Hobby Lobby. The ice cream cones are from Made EveryDay, the Boardwalk Delight line.

I think I resolved my Shorts conundrum. I have the Kid Shorts pattern from Made Everyday but it only goes to a size 10. SM is way out of that now. I was trying to figure out how to size it up, and I probably still could. But I discovered that Oliver+S has a FREE!!! Sunny Day Shorts pattern online, so I printed it off. They're made differently - Kid Shorts does not have a separate waistband, Sunny Days Shorts does. They're put together differently, even though they look pretty much the same when they're done. And hey, I don't know that SM will even fit into a 12 anymore - I've been buying her 14/16 at the store, and even went to the Juniors section when we were shopping for a dress for her last week. So we'll see. But at least I have one more size up after the Kid Shorts 10.

4. On Sunday night this week, I got a sewing bug, and in just a little while, I made a swim cover for JK. Adam asked how this dress is different from any other dress ... it's not. It's regular fabric. But the top is too loose to be modest so we'll call it a swim cover. JK found the bow in my basket of random items and asked me to add it.


She's ready for the pool! Bring on the summer!

5. I started ... another ... WIP ... a fabric pennant garland for summer camp. I'm going to our church's youth camp with SM as one of the adult chaperones, and this is girly in that campsites are "decorated" somehow. So enter a pennant garland. This is just getting started so no photos yet.

It has the typical triangles but also flowers scattered randomly in between. I made a bunch of flowers as a hand-sewing project (and one was even swiped by JK - she had me stitch it to a hair tie). The gathering stitch would be MUCH faster on the machine, but I wanted a hand project to carry around and knocked out over 20 of them just while sitting in a women's church conference. This particular version of a pennant/flower garland is from the book Sewing Bits and Pieces by Sandi Henderson - I got it from the library for a different project, but this looked cute too.

This has been a great way to clear out blues that quite frankly, I'm not going to ever use in a quilt because the fabric is too rough, doesn't go with anything else, or I just don't like it. Putting those fabrics in a garland that's going to get the crap beat out of it by being outside!


THE HOUSE
We have a baaaaaaaack-splaaaaaaaaash!


This was the last major piece of our kitchen puzzle, and kind of on a whim, we just got it done. I wanted glass tiles in some shade of blue. When I was running errands at Home Depot once, I went through their entire in-store selection and really wasn't happy with it. It's mostly brown-toned, which doesn't not work with our gray/black counter at all. I found a couple of things and took samples home but nope. So we tried Lowe's and hooray! They had a lot of blues! We brought home a bunch, and the all-white that Adam liked and grabbed at the last second was the winner. The blues didn't look right with the counter - that was a hard match. The white/gray was also the cheapest - score!

I went to a Saturday night book club and when I got home, Adam had most of it up. (I need to leave him unsupervised more often.) I just had to come through behind him for the wipe-down of the extra mortar. (Typical. He makes a mess, I clean it up.) It still needs the grout and to be polished off, but the tiles are up! Hooray!

28 May 2018

X is for X-block

I got behind on the Squared Away quilt block of the month challenge after just January and February. Now that it's May, I did March and April, and this is where X has arrived for the Alphabet Challenge - a quilt block!


March's color was green to celebrate the start of spring ... which did not arrive in my state until April, so this was wishful thinking.

April was yellow:


I like the sunshine! I needed some of that in April, because spring didn't come until the END of the month!

May's Squared Away block is still under construction. I made a whole bunch of HSTs, but then didn't like them. The white scrap fabric that I used is really flimsy. Now that Mindy and I have decided to give the twin quilts to our daughters who are "twinsies" (Cupcake and JK are very close in age, and were best friends last summer), I don't know that this fabric will hold up very well. Also, the pink in the HSTs didn't go with any of the other pinks I have - I didn't coordinate that well at all. So I need to start over on the May block, but had to put the quilts on pause to make summer shorts for the girls.

01 May 2018

W is for WIP

WIP is "work in progress" and I am working really hard that this quilt does not stall out and become a UFO!

Here's the story so far of the Night Sky quilt, which has now been in process for 16 months. It's going slooooooow.

When I was making The Pink Babies quilt and said that JE would get it, SM told me what she wanted for her own quilt - blues and purples with stars, like the night sky, because she would be sleeping under it. Makes sense. My brainchild was to do star blocks in white with blue backgrounds, rather than colored stars on lighter backgrounds as is common. We named it Night Sky before I even started.

Then I went a little crazy. I did online searches for star blocks because I wanted a variety - this is totally a sampler quilt. I've made maybe a couple of duplicates, but in different sizes. Mostly everything is different, but mostly also half-square triangles. I guess that's the easier part.

This was block 1. I found it in a Google image search (no source), and mapped it out on graph paper. It's huge - 20 inches across. I call it a Woven Starburst.


I made the next 4 large blocks veeeerrrry slowly over time last spring. We were busy at the time with house projects - remodeling the kitchen and a lot of painting. Adam had his Summer of the Mental Health Crisis. But by September 2017, this is what I had:

P.S. This is NOT a "design wall." It's just some random space between the doorway and coat rack on the left, and the water heater on the right. I pinned up my blocks because I didn't want them getting lost or messed up. Plus, they're pretty! I like to look at them!

The three 8-inch stars on the left were Mindy's contribution, that she wanted to add when she saw the big blocks during our family reunion. The little teeny bear claw was randomly pieced together of trimmings from the big blocks. At this point, I diagrammed the whole thing out on graph paper to figure out how to set in the large blocks and where I needed to add filler of smaller blocks.


January 2018, a year after I started cutting fabric: the first of five sections was done! Working on my Christmas log cabin quilt was going pretty fast, because that's the same block over and over. But I purposefully set that aside to focus on Night Sky. This is still going slow because I keep finding more star blocks online! But section one (top left on the graph paper) is finally done!


I set a baseline target this year to sew at least 2 1/2 hours every week. I did pretty well in January and February, but this quilt has to share my time with a lot of other things, as you can see from my monthly journal reports. During those 2 months, I made four 4-inch blocks and three 10-inch blocks. Then in March, as soon as I finished SM's costume for the school play - seriously, 15 minutes later - I gashed my finger with my rotary cutter. There went over a week of no sewing time at all. Dang it! Night Sky was entirely neglected in March.

In April, I got myself sewing again with little projects of zip bags and the pillow, and I had to make JE's baptism dress. Now we're starting May, so I'm regrouping on the quilts. I'm shooting for at least one block per week/four per month on THIS quilt - any other quilt blocks (like the Squared Away block of the month, which I'm now behind on) are extra.

22 April 2018

W is for white

Adam wants each of our girls to have their own white dress for their baptisms, and it's JE's turn!

We bounced around a bit on the pattern - the one she chose from my pattern box was too big, both for her and for the fabric that she selected at the store. (It called for making a circle skirt with the fabric out all flat, and the curve didn't fit from side to side between the selveges.) We ended up here: 

Girls Easter Dress Sewing Pattern, Ruffle Petticoat Dress by Handmaiden's Cottage

I was randomly looking at a spring dress round-up, which bounced me around a number of blogs ... and I came across this and thought, "There it is!"


I used my stand-by Oliver+S Playtime Tunic (number 11 of that pattern!) and modified the heck out of it. I:

- used size 7 for the top and size 10 for the bottom so it would be longer and more full.
- left the sleeves off, because the dropped shoulders are enough of a cap sleeve for a spring/summer dress.
- lengthened the bodice by 2 inches so it isn't right under her armpits.
- fully lined the bodice rather than using just the pattern facings.
- lengthened the skirt portion to a dress rather than a tunic top.

- put bias tape over the seam between the bodice and skirt, because wow, that was a crazy itchy edge on JE! I had intended to tuck this between the lining and outer fabrics, but I didn't cut the lining quite long enough. Fortunately, I'd just come across a tutorial about a Hong Kong seam finish. I don't know why it's called that, but I'm glad I found it!


- I didn't worry about stitching from the bias tape showing through, because it was already in the plan to add a band of lace at the divide between the bodice and skirt.


- added ruffles ruffles ruffles! They were first cut at 7 inches wide, and 2 lengths of selvage-to-selvage put together. I looped them all around the base skirt before attaching anything to see how they should be spaced, and I went with 4 inches apart. I started at the bottom, and worked my way up. The base is right side facing up, the ruffle is attached upside down (left side of the picture), and then folded down when it's done so the seam is hidden (right side of the picture).


You gotta be committed when doing ruffles - they take a lot of time, fabric, and thread. The dress would have been done in half a day if it weren't for the ruffles.

08 April 2018

V is for Valentine

We went a little crazy with Valentine's Day this year. We made:

- hearts out of plastic canvas and yarn. We ended up with more than 20 of these, and we looped ribbon and hung them up in windows. TA and JK kept saying they wanted to "knit" and I had to keep correcting them to "sew" or "embroider." They had found some random sheets of plastic canvas that have been kicking around for forever, and I cut every last bit of it into hearts. It was a lot of handstitching. My little girls thought it was awesome.


- cards with cardstock, foam stickers from Target, and ink/stamps. We didn't mail any out this year, just made them for each other.

- envelopes to hold all those cards along with some treats. I trimmed the tabs off manila folders and closed the sides with packing tape. Easy. Even SM, a big middle schooler now, loves our family Valentine party every year.


- "suncatchers" (although obviously without the SUN) with contact paper, tissue paper, and a Sharpie.


I'm in a bit of a craft-like-crazy mode this year, just to clear out a lot of old supplies that have been sitting around for forever. This was helpful with the plastic canvas and the contact paper.

And even though we moved into March and now April, I was still in heart mode when I made my little quilt for A Doll Like Me. I was trying to get it done for Project Quilting, but I got just the top done. Finally did some light quilting and the binding today. I outlined the hearts with stitch-in-the-ditch to make them stand out more, and then the loops down the side. I didn't want it too dense because I'm learning that dense quilting makes things stiff. This is for a child so it needs to be soft. The back is the same flannel that I used on the doll quilt TA made.

05 April 2018

U is for UFO

A UFO in sewing-speak is UnFinished Object. This is different from WIP - Work In Progress. A UFO is something that is just sitting there unfinished. A WIP is actually progressing, even if it's suuuuuper slow.

Over a year ago, I finished the Pink Babies quilt for JE. I had some blocks left over, so I put them together into a rail-fence big block and bordered it with the same fabric as the quilt border. And it's just sat there ever since, moved around from this shelf to that shelf.

I finally made it into a pillow this week.


The swirly pink top edge of the quilt is also the fabric for the back of the pillow. I was going to make a matching pillow case with it, but I cut it wrong so now it won't work for that. So it's the pillow back, and the last of it is into the scrap bin.

03 April 2018

T is for travel

More zip bags! This makes 11. (I need a card on the wall to make tally marks - I'm going to lose track one of these days.) I made these as a set - they're reversed from each other with the inside/outside fabrics.


The larger tan/red one is identical to the one I made for RG's teacher at school - my sister-in-law saw it and wanted one too. She didn't have toiletry bags for traveling, and her birthday was coming up anyway ...


And here they are in her luggage ready for their spring break trip.

17 March 2018

T is for theater club

At our middle school, theater/drama is not a class. It's an after school activity that anyone can participate in if they sign up. I like this much better than when I was in middle school, because if you didn't make the cut in audition, i.e. the teacher didn't already know you, too bad. Here, you're automatically in the chorus if you don't get a major role, so you still get to participate. SM loves theater and has already taken 3 or 4 acting/improvisation classes plus summer theater, and was so excited to be in a bigger play at school. There are 85 kids in the cast this year!!!

I kinda wish they'd given me a bit more notice, because I had only about 10 days (including 5 when we were out of town) to put her costume together for approval by the teachers. I thought they had a costume shop/stash but obviously not. Next year ... I will talk to them sooner. I had to rush this.

The play is Into the Woods Junior so SM needed to be a "fairy tale peasant." How did I do?


The top is a peasant top from this tutorial on Things of Cloth. You're supposed to add elastic to the ends of the sleeves to make them poofy but I skipped it.

The skirt is the Anywhere Skirt from Made EveryDay. I really like it and want one for myself! The red is a linen-ish heavier cotton so it's awesome for colder weather. She can wear this to church for the rest of the winter. I have a strip left over so I can make her a longer waistband when she outgrows this waist but can still wear the length. Just need to adjust the gathering. So this item could conceivably last many winters for her. Adam says this is one of the more professional-looking things I've ever sewn ... don'r look too closely at the buttonholes ... I thought about using brown wooden buttons but went with the black because she always ends up with black shoes.

The apron is something I put together just winging it, modeled after the pioneer-ish aprons my mom made for my kids years ago, and are in the dress-up bin. SM requested the white ribbon for a bonus.

31 January 2018

January journal

I'm going to try to keep a monthly log here of the sewing, quilting, and household projects I'm working on, so I can keep myself moving forward and keep track of what I'm actually doing.

I made a Year Ten sewing/house/project list a couple of years ago for my 10th year of being home to raise my kids. I didn't get very far with it because there was a lot going on with homeschooling and just life. It occurs to me that 2018 is Year Ten of this blog (!!!!) and it's gone through a lot of changes. My life has gone through a lot of changes just in the past 10 months, including putting my kids into public school. So I have a lot more time at home to do things that are NOT fighting about doing math. (Don't worry - there's still plenty of fighting about math. And science. But it's in a much more condensed time of day.)

My overall sewing goal for this year is to sew at least 2 1/2 hours per week and make one article of clothing per month. With 5 girls and me, this should mean we each get two new handmade items this year! The main sewing focus is quilts.

SEWING
- clothing item ... Well, let's start with what I did NOT do this month ... I have fabric pulled and a tutorial up on my phone, but just didn't get to it.

- 5 more blocks on the Christmas log cabin for a total of 12. I was working on this at New Years, then thought - wait. I have my kids' quilts to finish. Why am I working on this now? So this has now been deliberately set aside (as opposed to ignoring it while other things are more interesting) until I finish Night Sky, Extreme Reader, and T's Town.

- 2 hours of stitching on my DC embroidered map. This is taking a LONG time, but I'm okay with that. I'm trying to get the entire bottom section done so I'm not shredding the pattern any further by leaning on it to work on higher sections.

- 2 zipper bags for a total of 9, at least 4 more to go. These are birthday presents for cousins. I'm out of interfacing so need to go to the store before I can finish this project.


- 5 blocks on SM's Night Sky quilt. Most of them were little 4-inchers, and one 10-inch. I almost think that the little ones shouldn't "count" for the block tally but really, they take as much or more time than the big ones! Large pieces of fabric are a lot easier to work with than tiny ones! I got the first section of five finished. February's target is to get section 2 done. Adam says I should take out the solar system colored section, but I was going to put little pieces of it in other sections too so it's not a one-off. Any feedback?


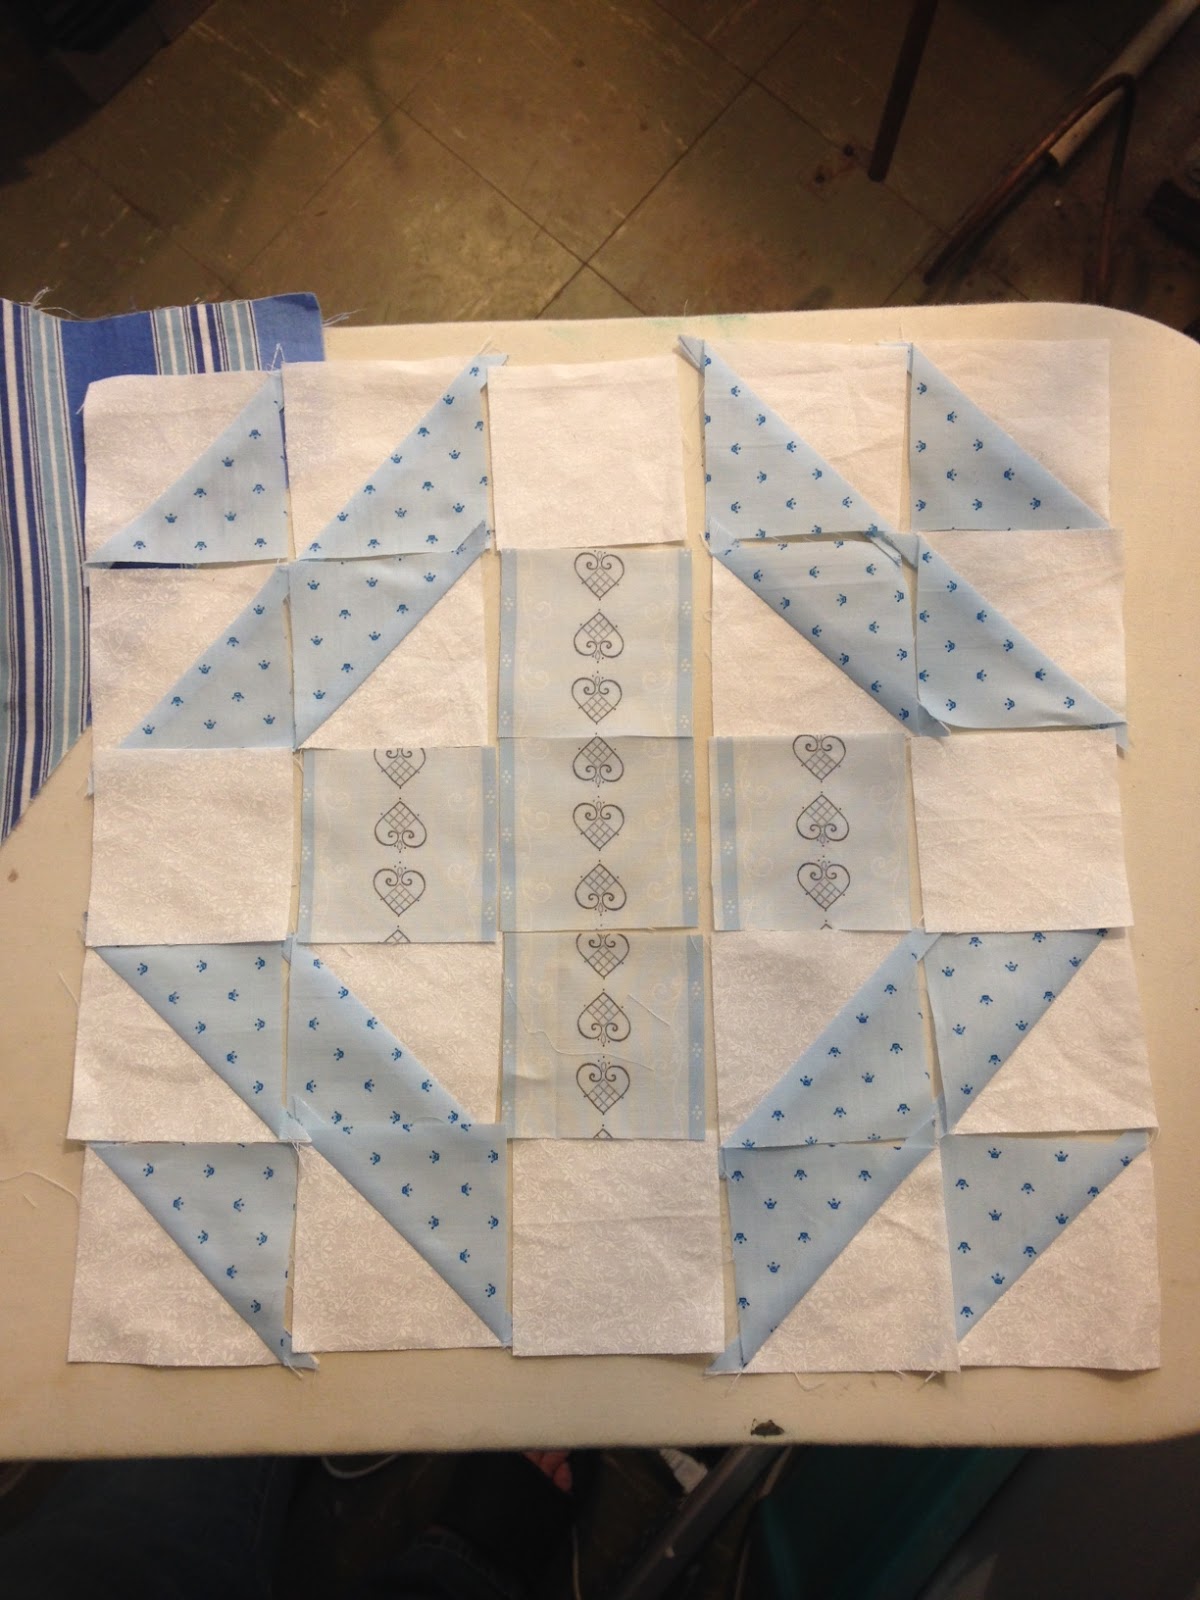
- 2 blocks for the Squared Away BOM (Block Of the Month). I saw this and thought it looked easy and kind of fun to make just a couple of blocks a month over the course of a year, and then get a quilt at the end! Mindy and I are going to make twin quilts - I made TWO of this block, and will give one of them to her and keep the other for myself. This particular BOM is intended to use up scraps, so they give a color every month - January was light blue, and this was the suggested block. I have another set of two with different light blue fabrics but they're not done yet. February is supposed to be purple, and the new block will be posted on Saturday.

Before it was sewn together and yes, I have two of them done. It's supposed to be 10 and a half inches square at the end, so there's a seam allowance around the outer edge. Mine was exactly 10 inches when I was finished, so somewhere in there, I'm doing my seams a shade more than a quarter-inch. I thought I was doing a correct quarter-inch seam, but apparently not if I'm losing a full half-inch. 

I decided my background will be white-on-white. I'm not sure where this fabric came from because I only had a little bit of it. Someone was cleaning out their fabric and giving me the little pieces. 

THE HOUSE
I also have a goal to do one project per month on the house. It could be sewing, but not necessarily - there's a lot of painting on the list. Adam did a lot of electrical work this month with fixing the 3-way wiring in a bunch of light switches. Whoever did them before we moved in had it all kinds of monkeyed up. That was his project. I suppose I could count it because it was project done for the house. But no.

My project was cleaning cleaning cleaning the homeschool area of the playroom, and opening it up to be an art/activity area. The kids now do their homework in the kitchen or at the computer desk in the living room where I can keep an eye on them, so having a study area downstairs is no longer necessary. We have a couple of years worth of paper piled up, multiple boxes with random game and puzzle pieces in them, and a crazy number of books that aren't read anymore. It wasn't a decorating scheme or paint job, but it certainly needed to be done and ... I'm still working on it.

OTHER CRAFTINESS
At church, I do all the weeknight activities for the girls ages 8-11. (LDS: Activity Days) We had a meeting with all the families of kids turning 8 this year to introduce them to the programming and get them excited to come. This was a gift for the kids my friend Megan and I did - painted wood frames and blinged them up, with a little sign of the sections of the Faith in God award program. We even made two for the boys.

04 January 2018

S is for some more stuff for school

I'm apparently on a run with making the zipper bags from Noodlehead. I started in the summer with trying to make them as little totes for my girls going to school, and the first one BOMBED. Badly.

Because we're supposed to post the failures, as well as the successes, so everyone knows it's not all perfect in Sewing Land, here you go. The little pouch wasn't too bad when it was open - very wide, as planned.


But.  It was SO wide open that when I zipped it closed, it went completely flat because I'd cut the box corners WAY too far into the bag.


I was annoyed but tried again. My second bag was MUCH better! I used a stiffer interfacing and didn't screw up the box corners. Look at how nice and tall it stands up!


So with making the failure, then the good one!, that gave me the optimism to keep going. I had one started for JE that I came across when I was cleaning my sewing room to finish the Woven Star quilt, and it occurred to me to make them for the girls' teachers. I did the 2 for the school teachers, 1 for book club, finished JE's, and did another for RG so she wasn't stuck with the failure. So I'm up to 7.


The Pearl Bracelets fabric one and the botched one were the Small size on the pattern. All the rest were Medium. And check out the fun red fabric! Jane Austen silhouettes! RG's favorite color is red, and I bought the Ardently Austen fabric for her book quilt (which is still just a pile of fabric - not even a Work In Progress yet).

I have orders in for 2 more for my littlest girls - they want "treasure bags" too! My sister-in-law wants one for her birthday for traveling, and her girls are all about accessories as well as having birthdays soon too, so that puts my total at 12. We'll see if I'm sick of this pattern after the next 5, and if I ever make it again.

I've made only a couple of other patterns this many times - the Playtime Tunic into about 10 nightgowns, I have no idea how many pairs of Kid Shorts, and the Bento bag 7 times (one for each daughter for their dance bags, and 2 gifts). So this is kind of weird for me to keep going with the same pattern. Admittedly, I did get a package of 40 zippers from Amazon during my Christmas shopping ... I need to make some elongated pencil bags too - my girls are all about their markers and colored pencils. Artists, the lot of them. 

03 January 2018

Y is for Yellow

When I found some super soft yellow and pink fleece at a garage sale, 
I knew I needed to make a Fluttershy costume for Snowflake.

See?  Perfect match!

It is a simplified Abbey Jacket, a tweaked hood from the Michelle Jacket,
plus a whole bunch of making-it-up-as-I-go-along for details.
The pants were just lengthened Basic Shorts. Much easier.
 
I even went so far as to hand-stitch some wings onto the back.
Even though it was for Halloween, it can keep her warm all winter!


The whole My Little Pony family:
Twilight Sparkle, Rarity, Fluttershy and Discord.

Juggling Balls


These fun little juggling balls are from the Oliver + S book Little Things to Sew.  I wanted a small project to do between bigger ones, and this one fit the bill.  Of course I spent more time agonizing over what fabric to use than actually sewing them.  Once I decided on the My Little Pony theme, it went a little faster.  

I only used scraps from my stash.  Thankfully I had recently stolen a few pieces from Trina, or AppleJack's ball would not have happened, and Rainbow Dash got a turtle!  I stuffed them all with unusably-small scraps, so some are firmer than others (fleece makes good stuffing, cotton is a little lumpy unless chopped up super small).  And I finally learned a proper ladder stitch so the openings just disappear into the seams.  

Although I had them done in plenty of time for Christmas, I decided to save them for Snowflake's first birthday, which is in just three weeks!  Where did the time go??